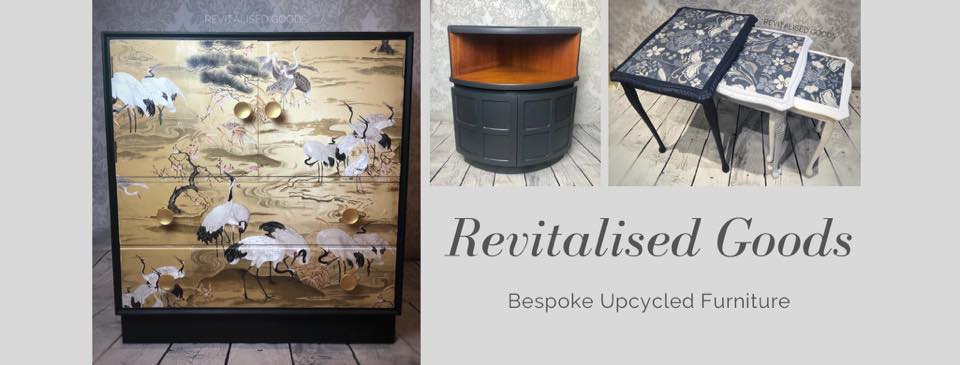
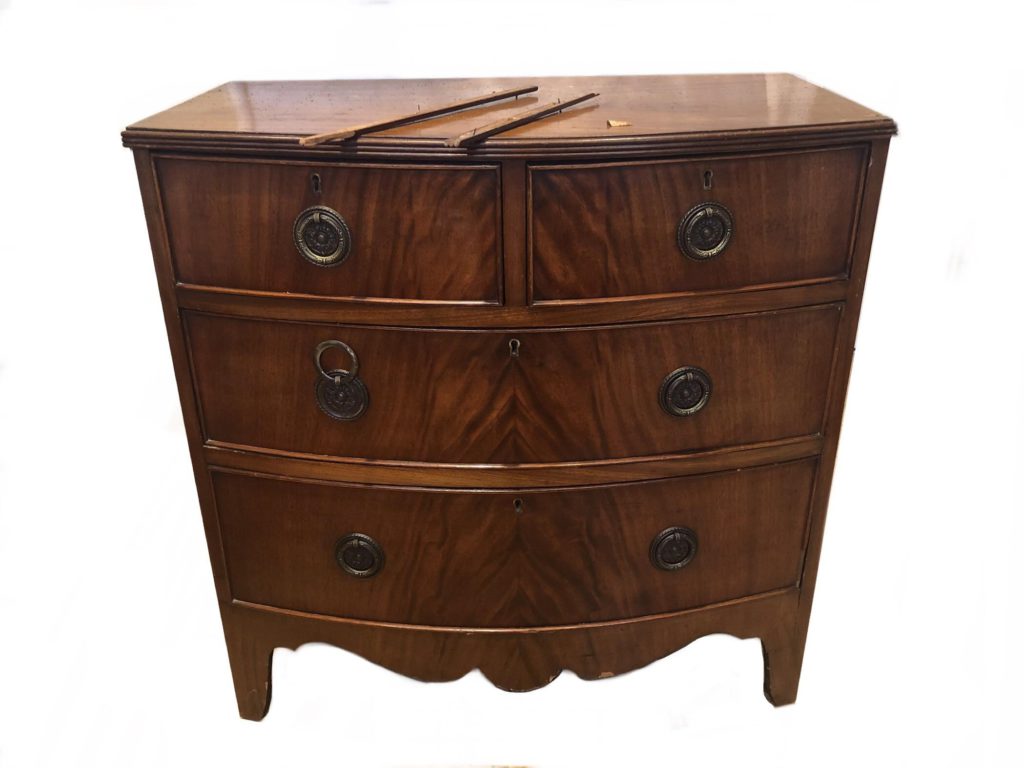
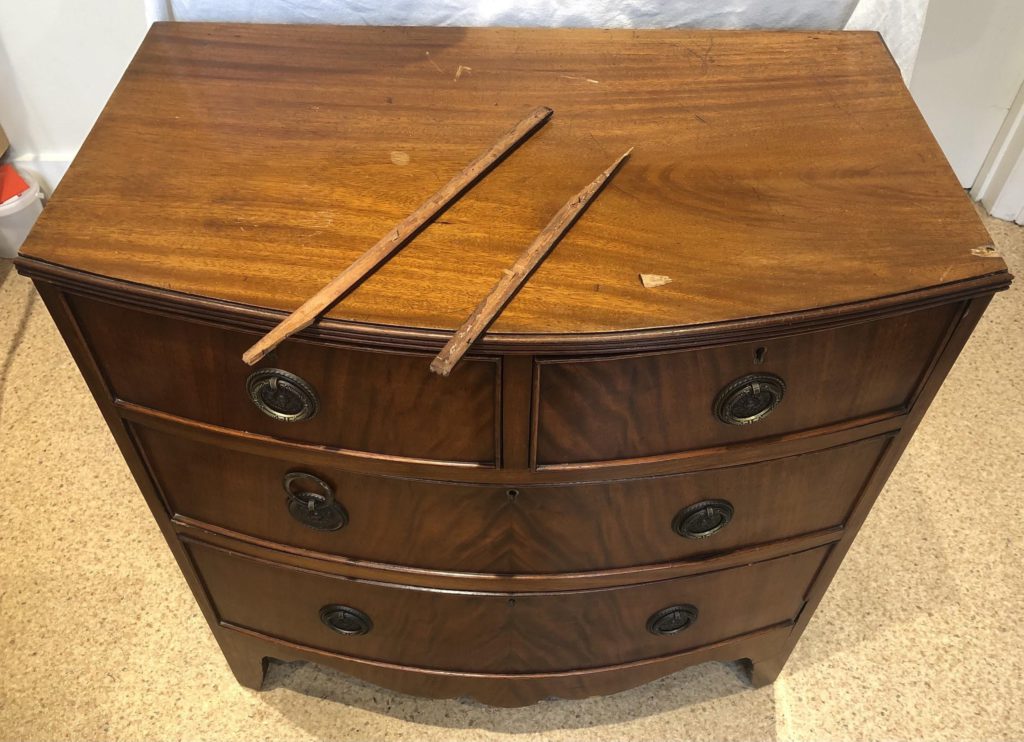
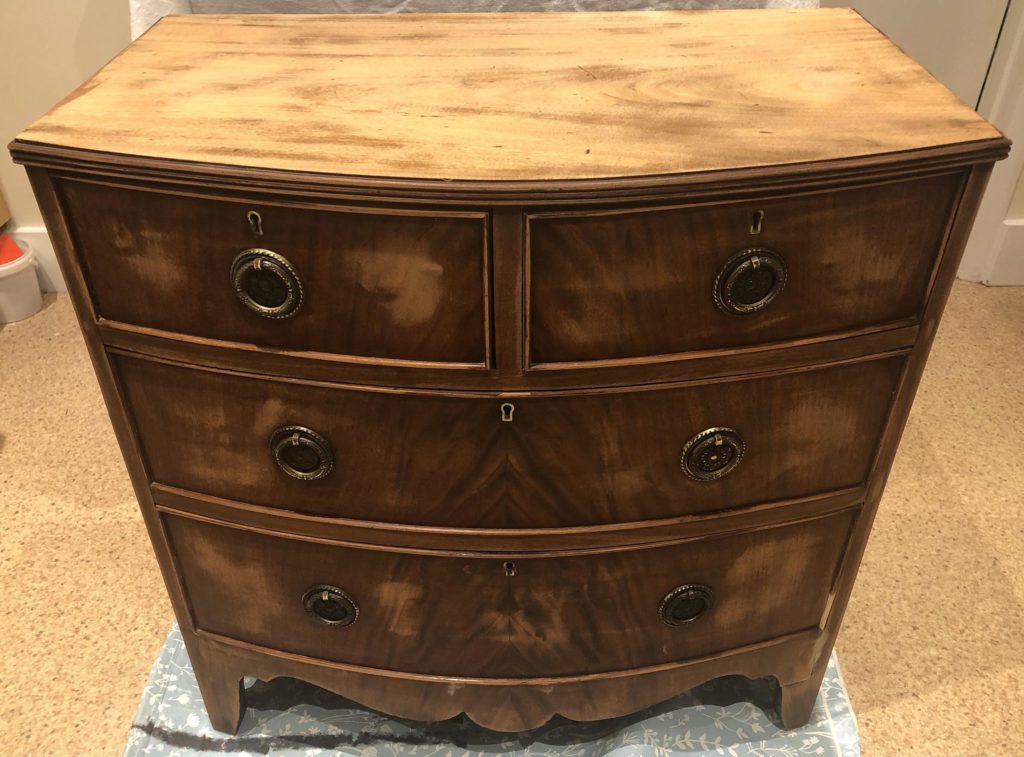
Upcycling Furniture. As we enter our third nationwide lockdown here in the UK, you may be looking for yet another new activity to fill your time or even just to provide a change in scenery. With that, I thought I’d share some tips with you on something that started out as a hobby and an outlet to relieve stress but has turned into one of my greatest passions; upcycling. I’m Jo and I’ve been refurbishing furniture for around 18 months. Upcycling has not only helped me cope with the previous two lockdowns but has also allowed me to explore my creative side. In this post, I’ll be sharing how I upcycled this bow fronted chest of drawers.
Step 1: Prepping
This step entails thoroughly cleaning the piece, sanding it, removing all hardware and making any repairs (if needed). It is not the most exciting part, but it is a very important step especially if you want long-lasting results.
Cleaning
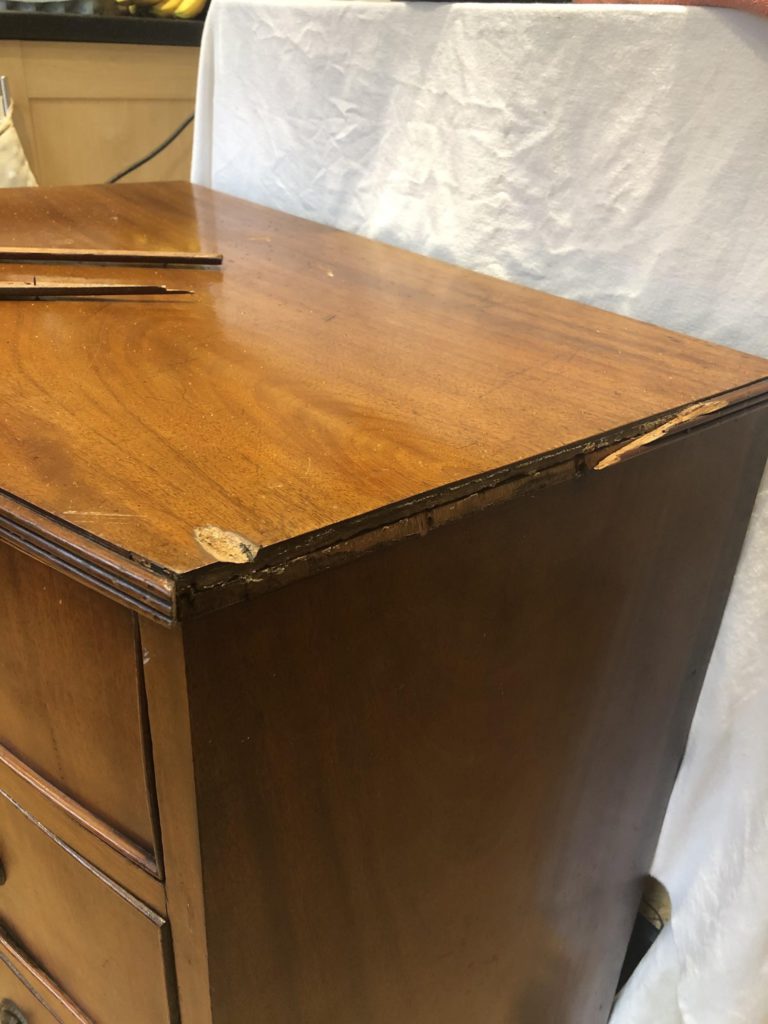
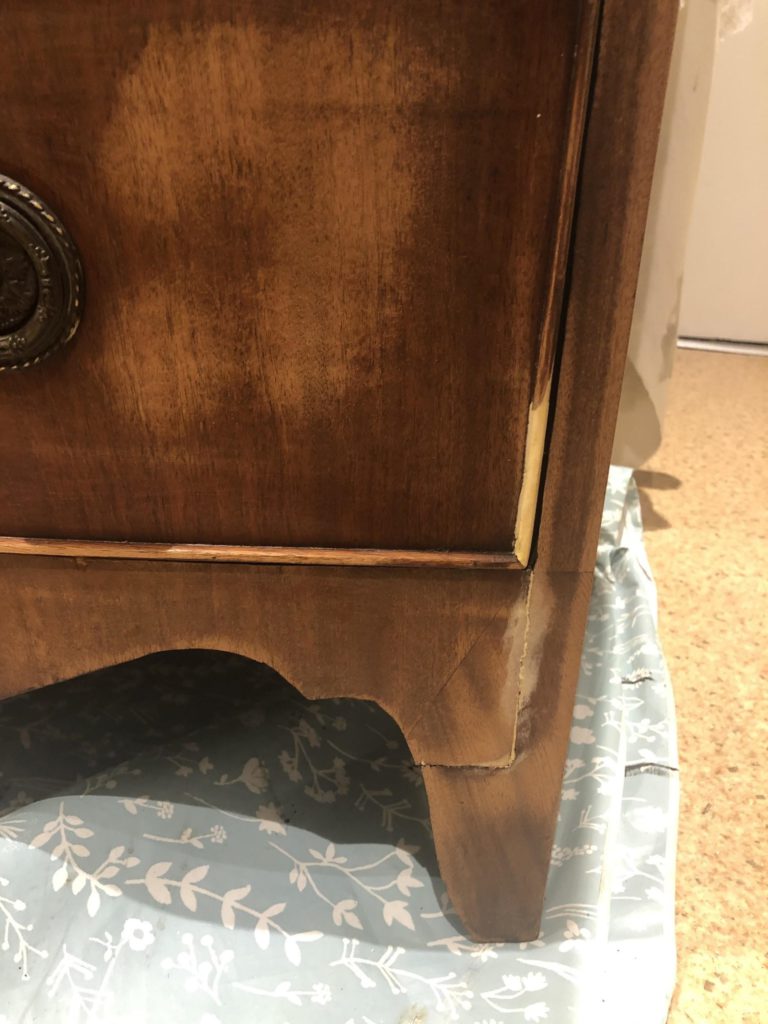
I use sugar soap with a cloth (and occasionally a wire wool) to clean all the pieces I work on. An alternative to sugar soap is a water and vinegar solution. This is to ensure the piece is free of dirt, oil and grease. As I clean, I tend to lookout for any cracks or damages that I’ll need to repair. With this particular piece, there were several areas which required repair (filling and re-attaching bits which have come off).
Sanding
Depending on the paint you use and the piece itself, the amount of sanding required differs. A general rule of thumb that I use is, the shinier the surface, the more sanding is required. This is because paint has difficulty adhering to the shiny surfaces. After sanding, be sure to wipe off the dust! For this piece, I sanded it back as much as possible as I was potentially going to leave certain areas unpainted but due to the damages, I ended up deciding against it.
Hardware
I personally prefer to remove all hardware before painting but it’s not a necessary step.
Repair
For the bits that had fallen off, I used wood glue and clamps to re-attach it. I used wood filler to fix the other damages (moulded missing bits from the top corner of the unit and filled out any uneven surfaces). Once dry, I sand the areas down to a smooth finish.
If you’re painting a piece that might bleed through (i.e. pine knots or dark stained furniture) or a piece which has a really shiny surface (i.e. laminate), I recommend using a primer (shellac primer for the bleed through and adhesion primer for the shiny surface).
Step 2: Painting
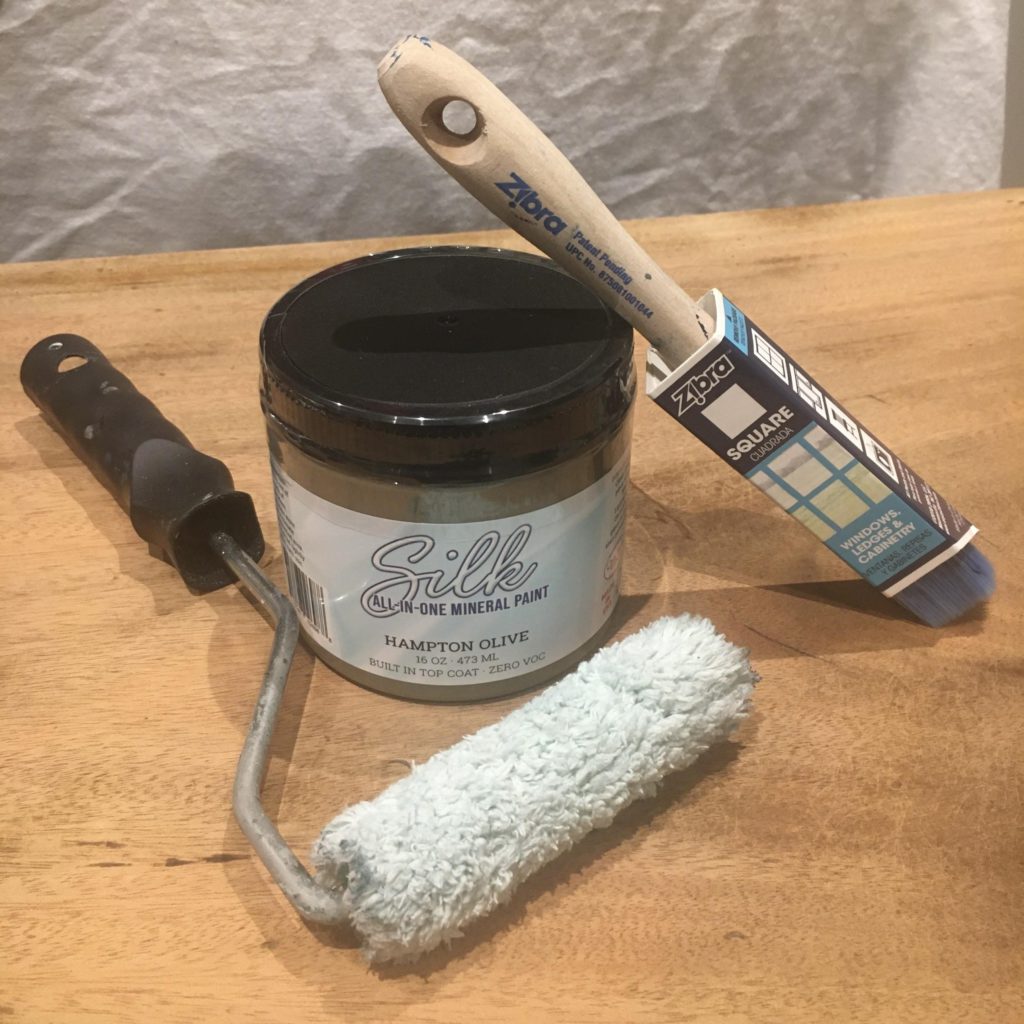
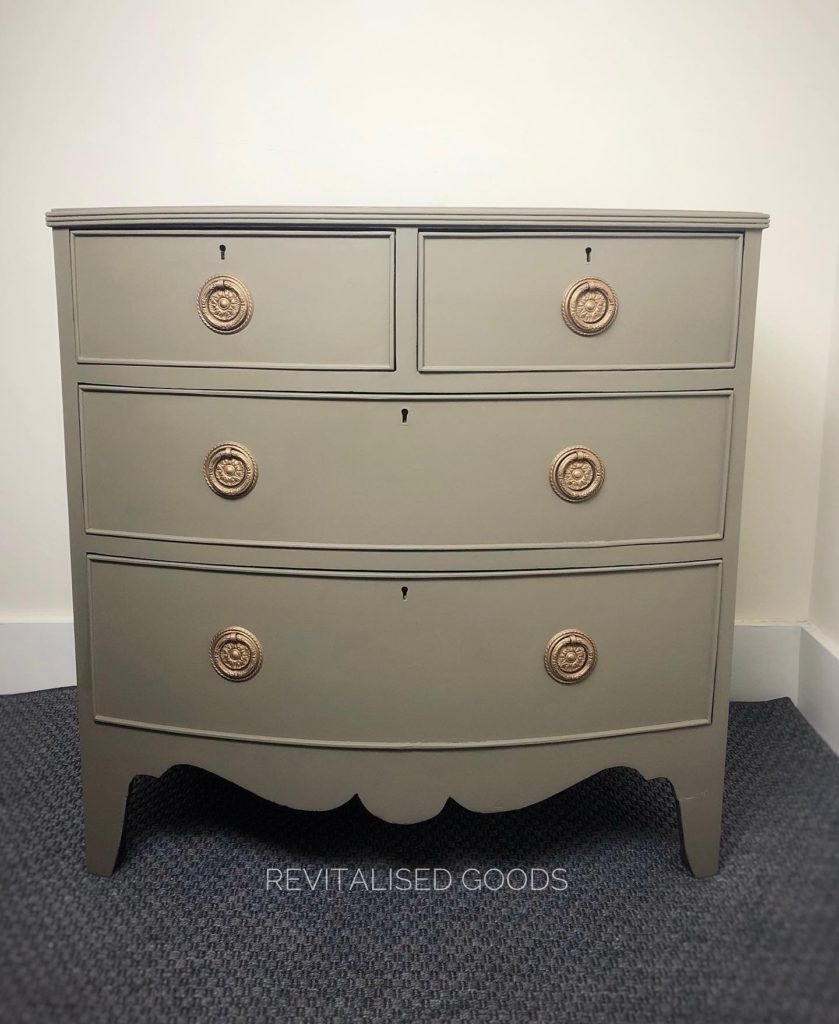
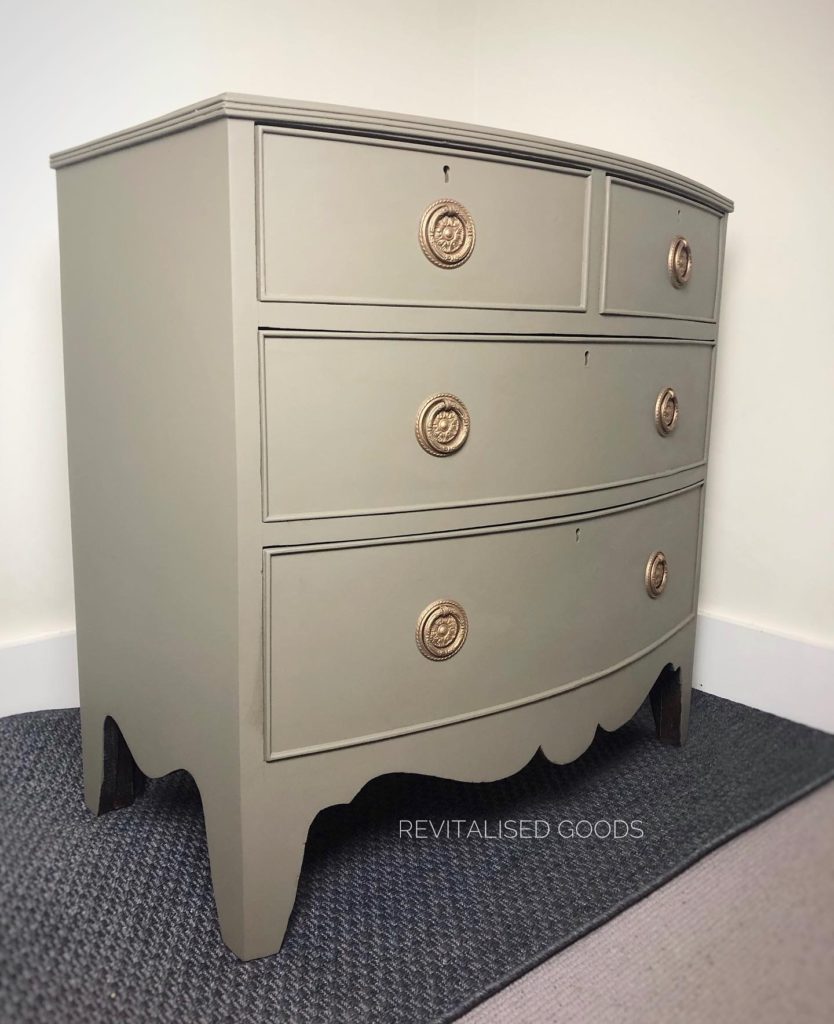
This is the fun part! Or at least, it is for me :D. I painted this piece in Hampton Olive, a muted earthy olive green colour from Dixie Belle Paint Silk Mineral Paint line. I used two coats on this piece. This was my first time using this colour (and I’ve only used this paint in another colour prior to this once). I have to say that I’m really impressed with the coverage and finish I get from this paint. I tend to use rollers when painting, especially pieces with large surface areas but keep a smaller brush at hand for the more detailed areas such as the corners of the drawers and areas with features. I strongly recommend the Two Fussy Blokes rollers and Zibra brushes as it always gives me a smooth finish.
Step 3: Finishing
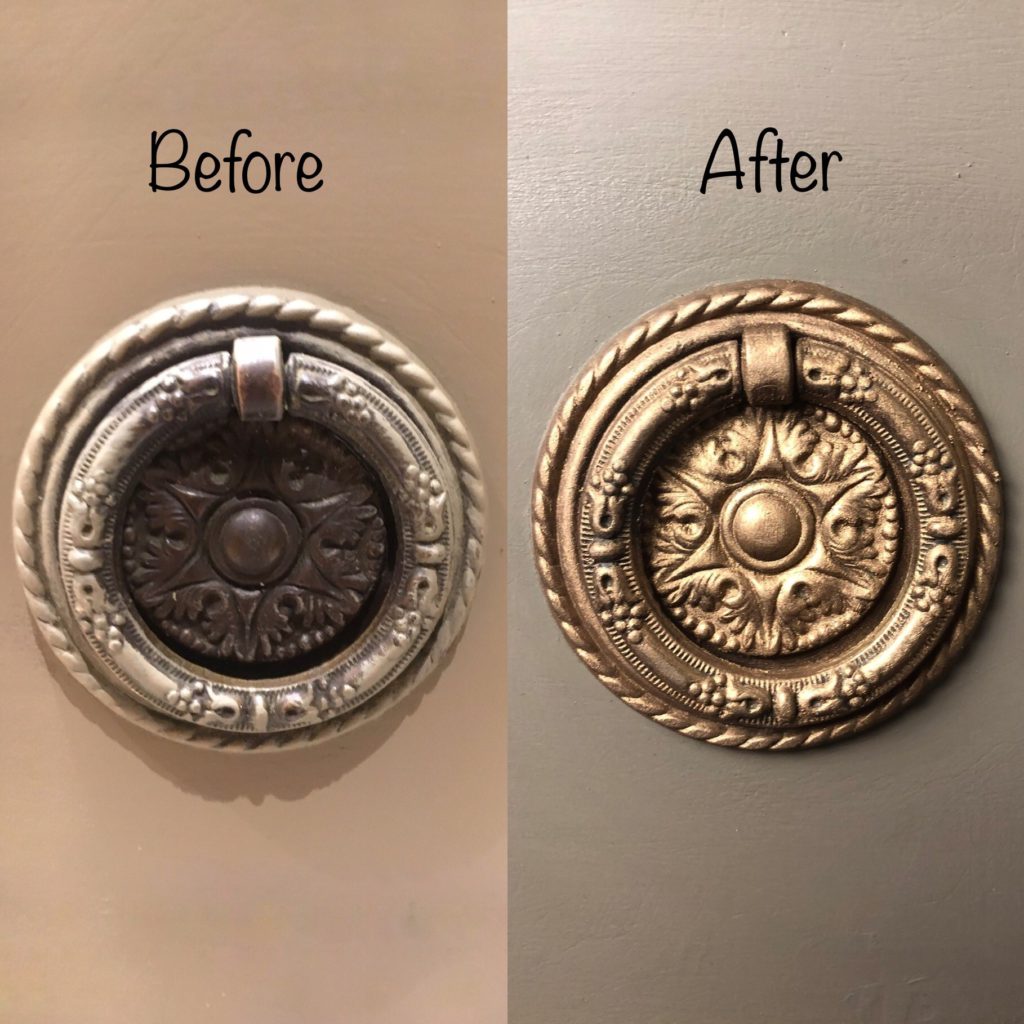
Once the paint is dry, refit the hardware and do any finishing touches as you’d like. Depending on the finish you’re looking for and the use of the piece, you could apply a top coat (wax, varnish, hemp oil etc) for extra durability. I didn’t apply any top coat on this piece as the paint has a built in top coat. As I was not able to remove the hardware for this piece, I used a product called Rub ‘n Buff, a metallic finish wax, on the handles to create a beautiful lustre.
Above is a link to the gold version but it comes in all colours – gold, silver, antique gold.
To finish, I applied wax to the drawers so that it moves more smoothly and lined the drawers with wallpaper. Here are photos of how the chest of drawers turned out 😊
I hope you found this post useful! If you do give upcycling furniture a go during this third (and hopefully final) lockdown, do tag @2hand7474 and @revitalised_goods ☺️
You can follow Revitalised Goods on Facebook and Instagram
This post contains some Amazon affiliate links in which Rumage may earn a small percentage from qualifying purchases but, at no extra cost to you. Thank-you for helping to support our blog!